Translate

Wednesday, January 14, 2015

Oink oink tender-loink! Secrets to a flawless, juicy, pork tenderloin.

Pork can be a very tricky protein to cook, especially if you strive to achieve juicy and tender meat but at the same time have a constant fear of under-cooking your meat and risking getting bad infections as a result. The FDA (Food and Drug Administration) has decreased the minimum required internal temperature of pork from 160 F to 145 F due to increased new production methods that reduce risk of pathogens. So no need to freak out at the pinkish color! It's safe to eat! The key to success is brining the meat ahead of time. I wanted to keep this pork tenderloin simple to really bring out the natural pork flavors. For my next experiments, it'll be more infused with some sauce/stronger marinade. The purpose of this test was to see how brining works and to see how this method of cooking the tenderloin would fare.

Brine:
1) Mix 4 cups of cold water with 1/3 cup brown sugar and 1 tbsp of salt.  Stir until completely dissolved.
2) Pat dry a nice hunk of pork tenderloin.
3) Allow the meat to brine in the mixture in the refrigerator for at least 2-3 hours, or overnight.
4) When you are ready to cook the meat, take it out of the brine and rinse thoroughly.  Then pat completely dry.

Cook:
1) Start with a cast iron pan or grill pan and bring it up to a high heat.
2) Add generous amounts of olive oil to the pan along with garlic and fresh thyme.
3) You may choose to season your pork with additional herbs, but you do not need additional salt since you already brined your pork.
4) Quickly sear each side of your pork for 30 sec to 1 min on each side.
5) Insert a meat thermometer.  Preheat your oven to 350F.
6) Cook in the oven for about 20 minutes, or until your pork reaches 140F internally.
7) Remove the pork from the oven and allow to rest for 10 minutes.  The internal temperature must reach a minimum of 145F for it to be safe to consume!  This temperature will yield a nice medium-rare/medium center.


Internal temperature reached about 150 F after resting


Tuesday, January 13, 2015

Quick and Tender Organic Chicken Drumsticks and Rice

So you're dragging your feet and barely making it back home after a loooong day of work.  Oh great, now you have to cook.  I'm already starving, and McDonalds is just a block away... no, I mustn't give in!!  Fine... I'll cook, I guess. Well, thank goodness for some thawed chicken drumsticks and my handy dandy pressure cooker!

Introducing, the fast, the easy, the awesomely tender... SOY SAUCE CHICKEN DRUMSTICKS with RICE.

Ingredients:
- Chicken drumsticks
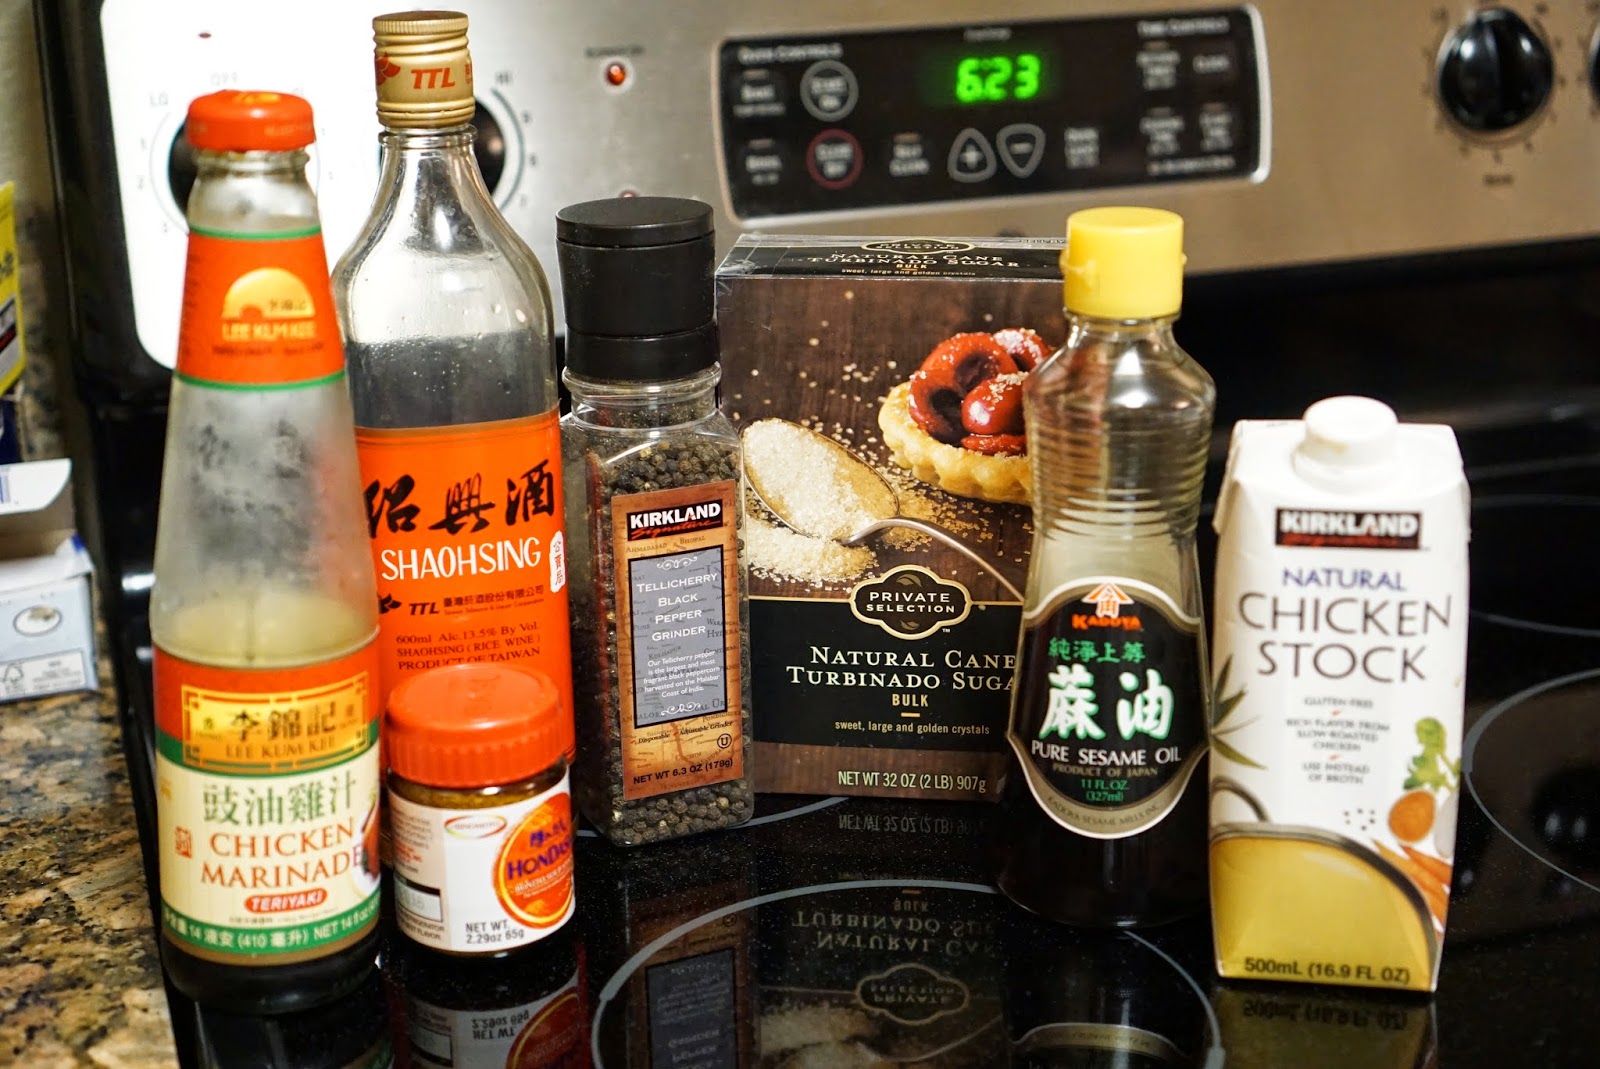
- 1/3 cup Lee Kum Kee or Amoy chicken marinade
- 4-5 drops of sesame oil
- 1/3 cup Shao shing rice wine
- 1 pinch of Hondashi (optional)
- 1-2 Tbsp Sugar or honey
- 1 tsp of black or white pepper (I prefer white, but I only had black pepper available at the time)
- 1/3 cup Chicken stock

Flavoring for the Chicken!
Instructions:

1) Be sure you have some thawed or fresh chicken drumsticks.
2) You may choose to brine your chicken drumsticks the night before. If you don't want to brine, skip to step #4.
3) To brine, mix 4 cups water with 1/3 cup sugar and 1 Tbsp salt.  Add some lemon slices and a few cloves of garlic to the brine mixture and add in your chicken.  Brine for a few hours or overnight.  When you are ready to cook the chicken, make sure you rinse the chicken thoroughly and pat very dry.

Ingredients to Brine!
Brine away!
4) Oil the pressure cooker pain and bring to a high heat.
5) Quickly brown the chicken on all sides
6) Throw in the mixture of flavoring the chicken into the pot after browning the chicken.


7) Shut the pressure cooker lid, allow to come to pressure level 2, and cook for 8 minutes.


8) Serve with rice.


Saturday, January 10, 2015

Conquering the Slimy and Slippery Octopus @ Home

I've always appreciated the taste and texture of Octopus but I have always relied on the professionals to cook it for me but not today! I decided to try cooking octopus myself and surprisingly the results were pretty great! If you are a little grossed out by how it looks, don't think about it! You are missing out as octopus has great flavor and taste! I bought a 3/4 lb whole Octopus for this experiment.

Ingredients:

3/4 lb Octopus
Salt
Cooking Oil (used Avocado oil)
Water
Lemon
Black Pepper
3-4 cloves of Garlic


Instructions:

1) Clean the octopus really well with cold running water to remove sand from the tentacles
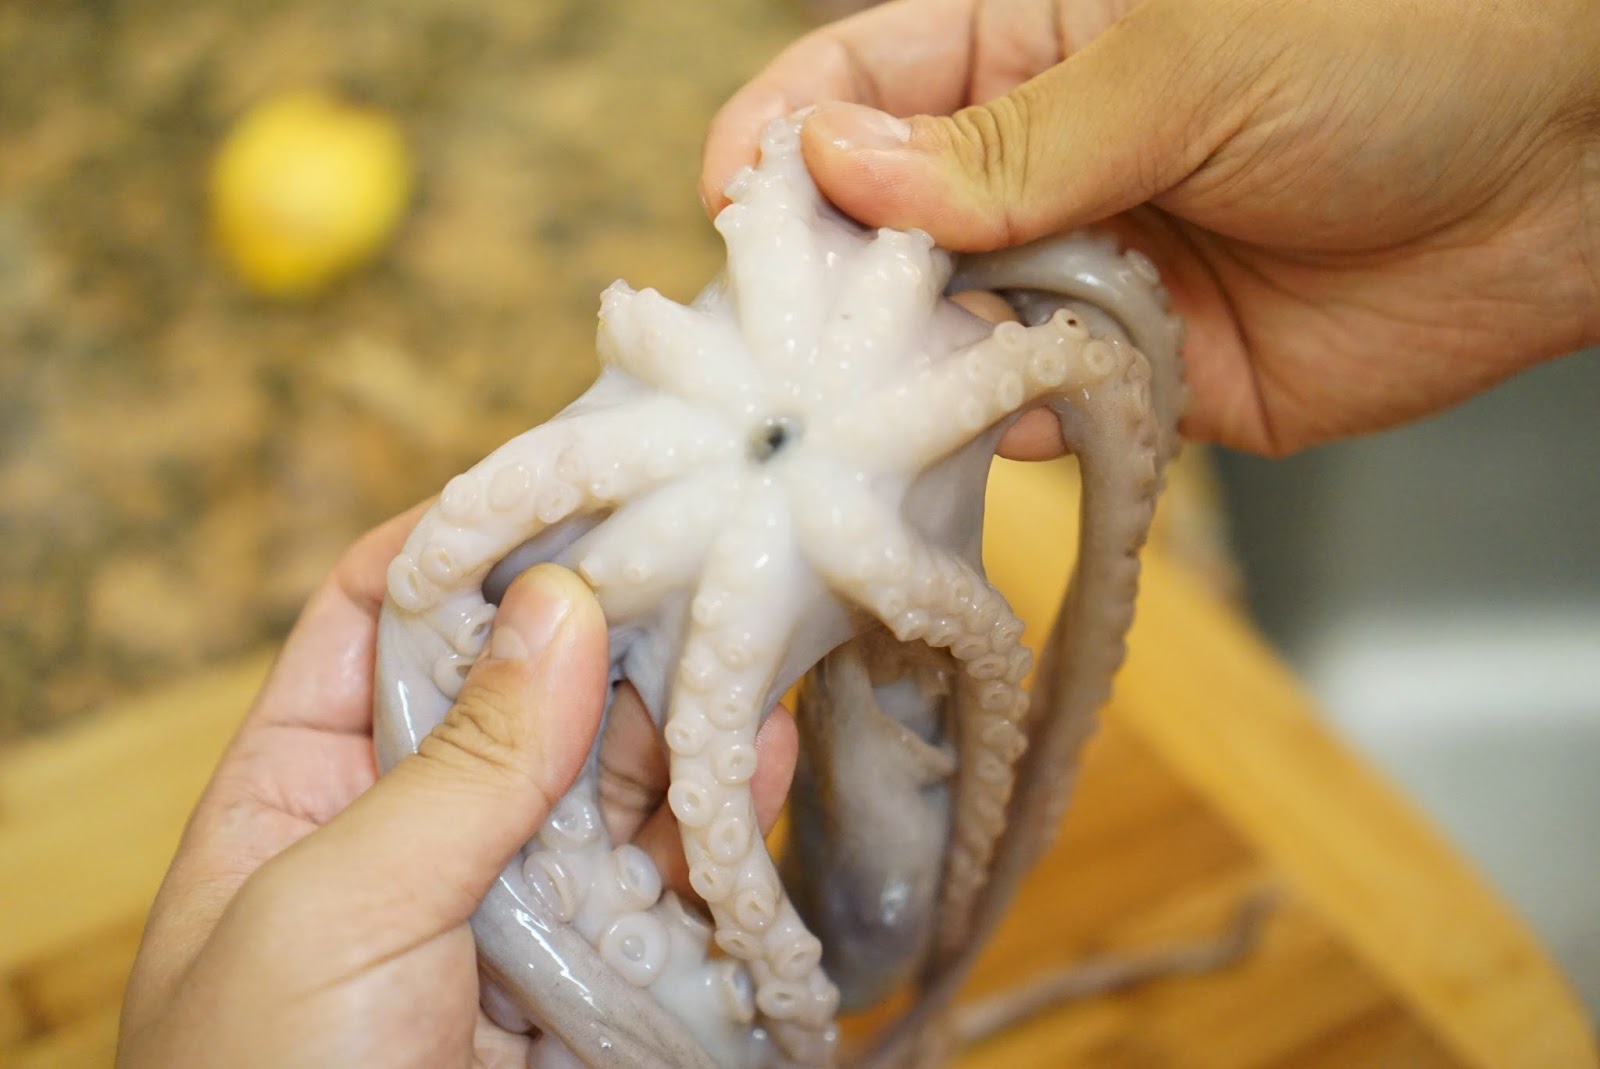
2) Remove the black plastic beak from the mouth which can be found directly underneath the head

Underneath the Head
Black Beak has been removed
 3) Clean out and remove the insides of the head of the octopus, should be just an empty pocket after it's all done
Clean and remove the inside!
4) Remove the outer layer skin on the head of the octopus

All cleaned!
5) Bring a pot of water to a boil and generously salt the water, insert slices of lemon, and dump in minced garlic into the pot.


6) Blanch the whole Octopus and repeat 3 times with 10 second intervals in between (this relaxes the octopus and prevents from stiffening up/making for a tough texture)


7) Reduce to a simmer and set timer to 45 minutes (usually it's 1 hr per lb)


8) Now time has elapsed, let it rest for 5 minutes or so.

 
9) Dice the octopus into nice edible portions and sprinkle cooking oil, salt, and pepper over it.
10) Cheers!

Tada!


Wednesday, January 7, 2015

Dessert of they Day: Peanut Powdered Green Tea Red Bean Stuffed Mochi

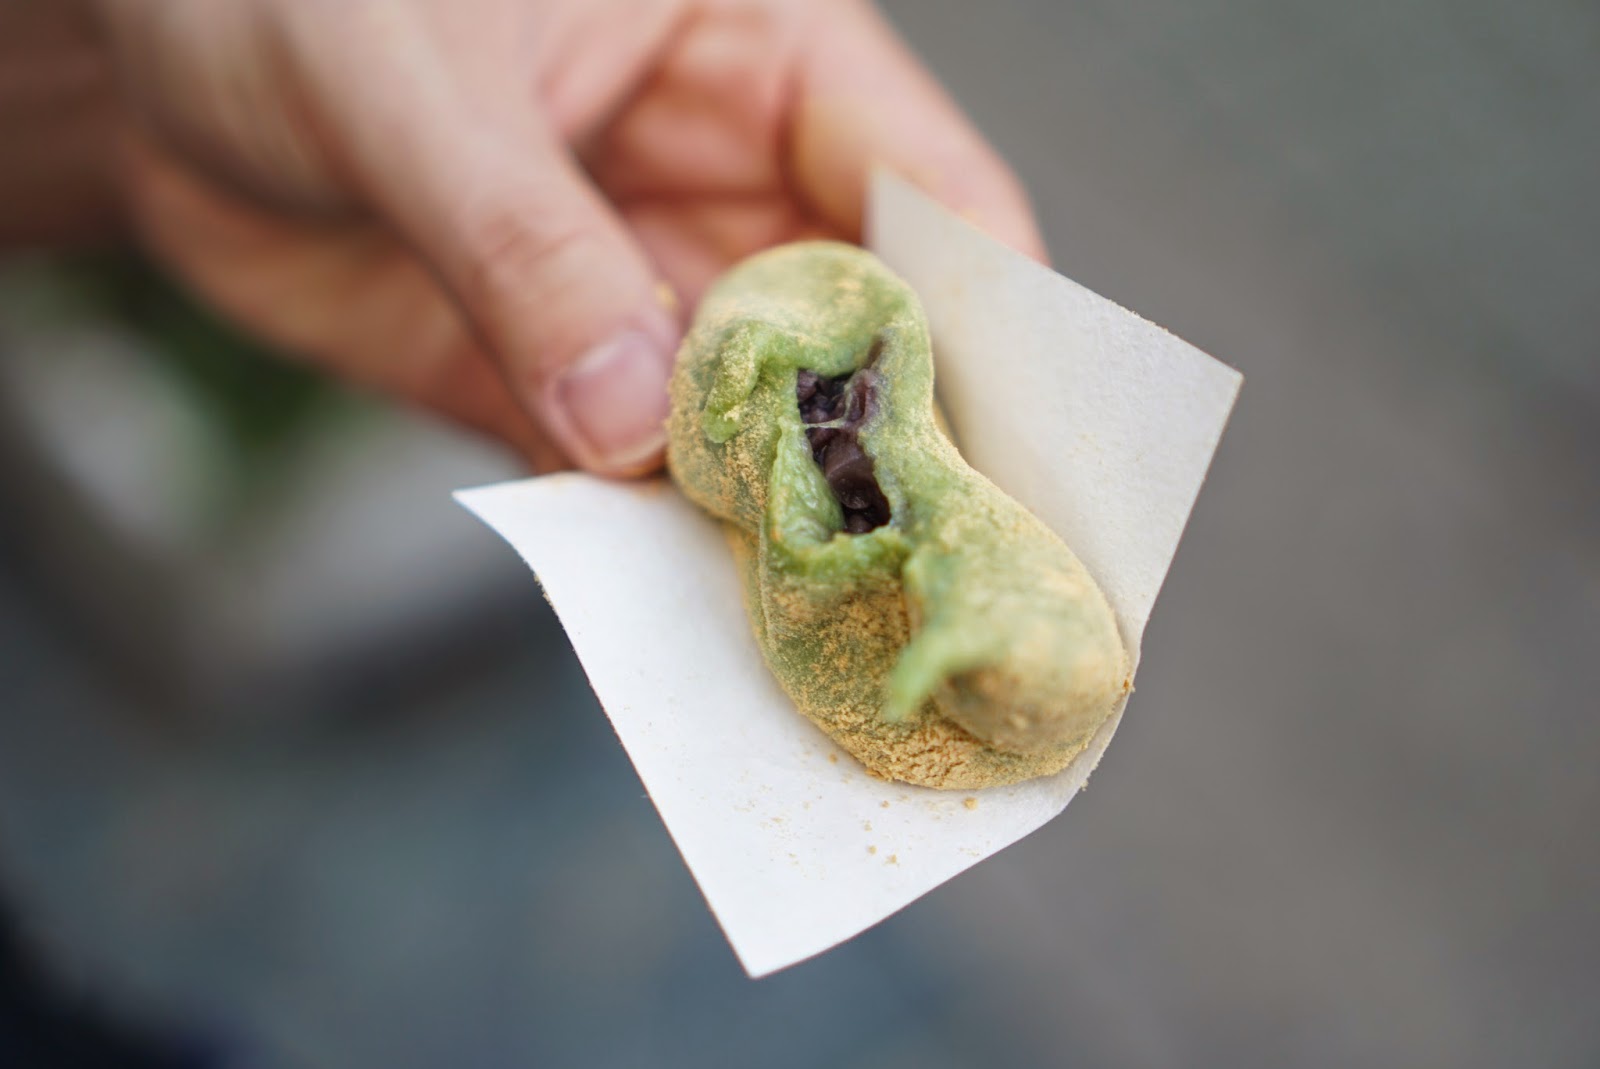
For all the dessert lovers that don't like things too sweet but not too sweet, I give to you Mochi! Mochi is a sticky treat made of rice flour and makes for a surprisingly light dessert. I came across a busy spot in Nara, Japan where they show you how it's made and it's pretty intense. They come with the unpressed Mochi dough and insert it into some wooden Mortar and beat the living crap out of it with their hands and a wooden hammer in rapid strokes. It's quite an interesting demonstration and you start to appreciate Mochi a little more after how hands on it is to make. Do you like Mochi? Where do you get your Mochi? The one I got here was quite a mouthful as it was Peanut Powdered with Green Tea Mochi stuffed with Azuki (Red) Bean. It was pretty good and for only 130 YEN or ~ $1 USD, can't really complain!


130 YEN!

Hammering and Reshuffling away!


Mochi maker


Peanue Powdered!

Azuki (Red) Bean stuffed!

Thursday, December 25, 2014

Smoked Salmon and Turkey Formaggio Penne

I miss Asian Western pasta dishes so I went to my nearby grocery store to grab simple ingredients to make this dish. It's really easy and the bulk of the cooking time is cooking the pasta as the meats are already smoked and ready to consume.

I'm really starting to like this pasta sauce which is called Formaggio. It consists of Tomato, Ricotta, Parmigiano, and Reggiano. It resembles the Rose sauce which is a mixture of Red Tomato and Alfredo sauces.

I always love Smoked Salmon with my pasta and I was still craving the Smoked Turkey drumstick from Disneyland and was so glad they had it in my nearby grocery store.

Ingredients:

1 Smoked Turkey Drumstick
Slices of Smoked Salmon
Pasta of your choice (used Penne pasta)
Dried Parsley
Sauce of your choice (used Formaggio)


Tips to cooking pasta:
  • add some salt in the water
  • ensure ratio of pasta to water is at least 1 to 1.5, you want to be boiling pasta not cooking/braising it
  • add some cooking oil in the water as well
  • most importantly, taste couple noodles before fully straining it to ensure it's cooked exactly to your liking as the timing on the pasta packages are not always accurate

Sunday, December 21, 2014

Happy Holidays starts with a perfect Rib Roast meal!

I recently bought a 6 lb Rib Roast from my nearby grocery store to start the first but many more coming festive dinners! I'm pretty content with the results on this one, it's very simple. Here's what I did!

Ingredients:

~ 6 lb Rib Roast
Coarse Salt
Coarse Pepper
Italian Seasoning (Thyme, Garlic, Onion, Rosemary, Oregano, Basil, Sage)
Sticks of fresh Thyme
Cooking Oil (used Avocado oil)

Instructions:
Bringing roast to room temperature is key!

1) Bring your rib roast to room temperature to ensure even cooking (at least 1 - 2 hours prior)
2) Pat the rib roast really well to remove any moisture (use lots of paper towels!)
3) Season generously on all sides of the rib roast with salt, pepper, and Italian seasoning

Season generously!
4) Preheat oven to 450 degrees F
5) Coat roasting or grill pan with cooking oil and throw in fresh sticks of Thyme and allow it to preheat in the oven as well


6) Once oven is preheated to 450 degrees F, place rib roast fat side down to sear for ~ 20 min

Fat side down!

7) After 20 min has elapsed, turn down oven to 300 degrees F and flip the rib roast so it's fat side up now and let it roast for 1.5 - 2 hours for medium rare.
*Be sure to use a meat thermometer and adjust accordingly on cooking preference (135 F for medium rare, 150 F for medium, 160 F for well done)
8) Once the temperature has reached to your desired cooking level, take it out and let it to rest with an aluminum foil lightly wrapped on top of the roast for another 20-25 minutes before cutting it else all the juices will just spill out and not stick to the meat!


9) And enjoy! Happy Holidays and may your rib roast dinner be victorious!


Drizzle some Worcestershire sauce for more flavor!
*Many recipes call for roasting the majority of the roast at 350 F but I find that it shrinks the meat too much and renders it dryer/less moist. The lower the temperature, the less shrinking your rib roast will face. I found 300 F to be a great temperature in terms of results/time required. If you really have a lot of spare time, suggest going down to 250 F.

Thursday, December 18, 2014

Sweet Taiyaki (Japanese fish-shaped cake) and Kasutera (Sponge Cake Mini Balls) !

Taiyaki literally means "baked Sea Bream". In Japan, the Sea Bream or in Japanese it's referred to as "Ma Dai" is prized for its flavor and is often served during New Year's and other festive events such as weddings. I got the opportunuity to have fresh Sea Bream sashimi and it was really delicious. Reminded me of the Amberjack Tuna for its buttery but yet really clean fresh taste. But this post isn't about the actual fish but the dessert!

Taiyaki is a Japanese fish-shaped cake that usually has some fillings inserted. The most common is the red bean paste filling from sweetened Azuki beans but you could also have custard, chocolate, cheese, or sweet potato. It's made with some kind of waffle or pancake batter and is poured into very detailed molds. I ended up getting the custard one as we recently had Azuki red beans in our Dorayaki (Click Here for the Details)!

They also had another popular pastry called Kasutera which basically were sponge cake shaped into tiny balls.

You can kind of think of it as a lighter, fluffier, and most likely healthier version of a Boston Cream donut. What do you think? Let me know!

The place we went to was called Kasuteira Taiyaki. We just randomly came across it and it was found near the entrance of a subway station called  Tsuruhashi in Osaka.

Name: Kasuteira Taiyaki
Location: Tsuruhashi station
Google Maps: Click Here

Store Front

Hello Fishies
Insertion of Red Beans
Sea Bream!
Inside Custard!
Kasutera- Sponge Cake balls